Container Vulnerability Scanning
A guide to scanning containers and container repositories for security vulnerabilities both manually and automatically.

Introduction
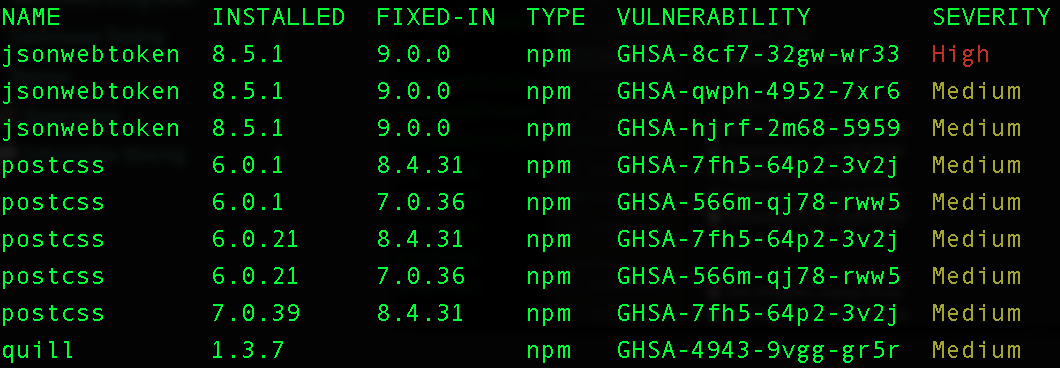
Background: To maintain the integrity and security of your containers in production environments, it's essential to monitor dependency vulnerabilities. Third-party software dependencies can harbor security vulnerabilities. This guide focuses on utilizing Grype, an open source vulnerability scanner, to proactively detect vulnerabilities in dependencies defined within container images as well as generally within repositories that use package managers.
Use Cases:
- Scanning container images for vulnerabilities during the development phase
- Ensuring base container images are as vulnerability-free as possible
- Scanning package-manager defined software dependencies (e.g. NPM, YARN, Maven, etc.) for vulnerabilities during the development phase
- Automating vulnerability detection in repositories
Prerequisites
Software:
- OCI compliant containers (e.g. Docker, Podman) or other package-manager software dependencies
pre-commitframework
Skills:
- Basic knowledge of Git hooks and Docker commands
- Understanding of YAML for pre-commit configuration
Quick Start
Run a local scan of your container's repository (folder containing the Dockerfile) using Grype
grype dir:.
Run a local scan of a Docker image using Grype
First, build the Docker image:
docker build -t my-app:latest .
Then, scan the built Docker image:
grype my-app:latest
⬇️ Grype Scanning .pre-commit-config.yml
Download the file above to access the pre-commit configuration file, which includes an example hook for Grype vulnerability scanning. This file should be placed within your local Git repository after installing the pre-commit framework.
GitHub Action for Grype vulnerability scanning.
Step-by-Step Guide
Step 1: Scan Locally for Container Vulnerabilities
-
Ensure Grype is installed on your system. You can install Grype from the official repository.
grype version -
Perform a scan of the local repository for vulnerabilities. The below checks for vulnerabilities via any common package managers that are detected in your repository. See Grype supported sources for more information.
grype dir:. -
To scan a Docker image, first build the Docker image:
docker build -t my-app:latest . -
Then, perform a scan of the built Docker image:
grype my-app:latest -
If you find vulnerabilities, fix them via your package manager.
Step 2: Setup Automated Local Scanning of Container Vulnerabilities
⚠️ NOTE: We recommend installing this pre-commit hook only if you have downloaded grype, already scanned your repository and addressed any vulnerabilities.
⚠️ NOTE: The automated scan described below will NOT check for image vulnerabilities, rather, it uses the package dependency capability of Grype to look for third-party dependencies via grype dir:.
The below steps, once enacted, will ensure that any local git push actions taken will be followed by an automated vulnerability scan. If vulnerabilities at the CRITICAL level are found, the push will be blocked by default.
-
Install the pre-commit framework via Python:
pip install pre-commit -
Create a
.pre-commit-config.yamlfile in the root directory of your Git repository with the following content for Grype scanning:repos:
- repo: local
hooks:
- id: grype-cve-scan
name: Grype Vulnerability Scan
description: Scans for dependency vulnerabilities. Fails if CRITICAL vulnerabilities detected.
entry: python -c "import os; import subprocess; import sys; os.environ['GRYPE_DB_AUTO_UPDATE'] = 'false'; result=subprocess.run(['grype', 'dir:.', '--fail-on', 'critical'], capture_output=True); print(result.stdout.decode()); print('CRITICAL level vulnerabilities found. To address issues, run scan via `grype dir:.`, then `git add` followed by `git commit` your fix or ignore via `git commit --no-verify`') if result.returncode != 0 else print('No CRITICAL level vulnerabilities found.'); sys.exit(result.returncode)"
language: system
verbose: true
stages: [pre-push] -
Initialize pre-commit in your repository with the new configuration:
pre-commit install -
Grype-based vulnerability scanning should run every time a
git pushis invoked. The push will be blocked if CRITICAL level vulnerabilities are found and will ask the developer to fix them prior to committing. Otherwise a report will be provided for reference.
Step 3: Set Up Automated Repository Scanning
For GitHub users, we recommend:
- Installing the official Grype GitHub action to set up automated dependency vulnerability scanning. The tool is available at this link.
- Setting up GitHub's official Dependabot action to also look for vulnerabilities. See our GitHub Security Guide on this.
Frequently Asked Questions (FAQ)
Q: What happens if the pre-commit scan finds vulnerabilities?
A: The pre-commit hook will prevent you from committing changes until the vulnerabilities are resolved. The scan is set to alert only for critical vulnerabilities by default to minimize disruption.
Q: What if I want to skip the pre-commit scan temporarily?
A: You can bypass the hook by using the --no-verify flag with the git commit command, though this is generally not recommended.
Q: Is it possible to run vulnerability scans without pre-commit hooks?
A: Yes, you can incorporate scans into your CI/CD pipeline or utilize other repository scanning tools, which can prevent pushing vulnerable code.
Q: What's the difference between Grype and GitHub's Dependabot? Why do I need both?
A: Grype relies on free and open software vulnerability databases whereas GitHub's Dependabot may be using proprietary methods. In our testing, we've found some non-overlapping vulnerabilities that are sometimes found in one tool but not the other.
Credits
Authorship:
Acknowledgements:
- OPERA SDS Project for implementation guidance
- @ddalton-swe for tool suggestions
Feedback and Contributions
We welcome feedback and contributions to enhance this guide further. Please refer to our contribution guidelines.